|
|
Database Reports |
|
|
|
|
A database Report shows the results of a
Query. Reports can be designed in many different ways in order to display the
information in a way that makes it easy for readers to understand the results
of a data query. |
|
|
https://www.techrepublic.com/article/how-to-build-a-database-report-using-libreoffice-base/ Jack Wallen shows you how to create a report from a
LibreOffice database using built-in tools.
Image:
Jack Wallen For
most, the LibreOffice
office suite is a way to create documents, spreadsheets, and presentations.
However, there is a very powerful tool lying in wait for you to use:
LibreOffice Base. Base is exactly what you think it is,
a database tool. With it, you can do quite a bit--even connect to and manage
a MySQL database. One of the
many handy features, included with LibreOffice Base is the report builder.
With this tool you can create and run reports on any given LibreOffice Base
database. I want to walk you through the steps of creating and running such a
report. I will assume you already have LibreOffice installed and a database
ready to use. I'll be demonstrating with LibreOffice 6.0.2.1 on Elementary OS, but the
process is the same, regardless of platform. If you're using an older release
of LibreOffice (pre 5.x), the layout and steps will vary. I highly recommend
you update to the latest version of the software. Do note, you must have a Java Runtime Environment (JRE) installed
for the Reports tool to work. How you install the JRE will depend upon your
platform. For example, on a Debian-based
distribution (such as Ubuntu), you can install with a single command: sudo apt-get install default-jre Opening
the database
The first
thing you must do is open the database. To do that, open LibreOffice Base,
select Open an existing database file (Figure A),
select the database to be used from the drop-down, and click Finish. Figure A
Opening a
pre-existing database. The
LibreOffice Base window will open with your database ready to use. Creating a
report
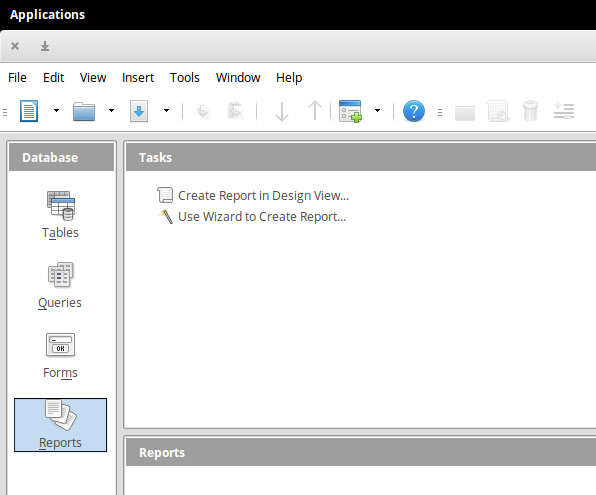
From the
main window, click on the Reports icon in the left navigation (Figure B), and then click the
Use Wizard to Create Report button. Figure B
Creating
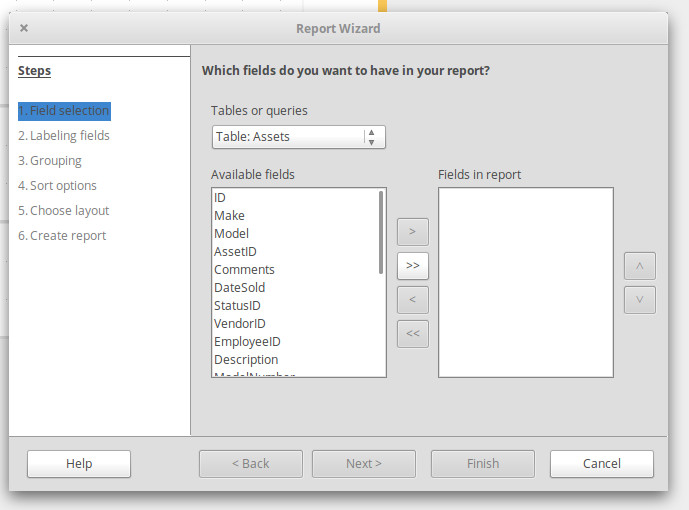
our first report. In
the pop-up window (Figure C),
select the Table to be used for the report from the Tables or queries
drop-down, and then click to select the fields you want to use in your
report. To add fields, make sure they are selected and then click the
>> button. When you have exactly the fields you want in the right pane,
you can either click Finish (if you're in a hurry and just need the data), or
click Next (to further configure your report). Figure C
Selecting
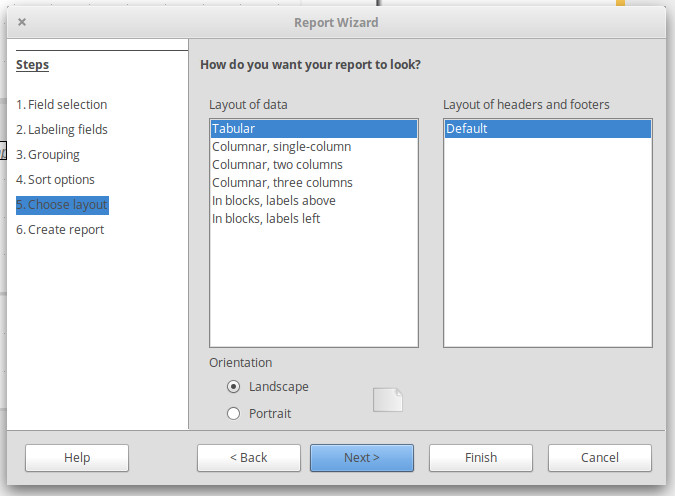
the table and fields for the report. If
you clicked Next, you can then in the resulting windows, configure labeling,
grouping, sort options, and layout. One nice feature about the extended
configuration options is that you can choose a specific layout for your
report. Available options are:
You can
also select the orientation of your report in the layout window (Figure D). Figure D
The right
layout can make your report easier to read. Click
Next, select if you want a Static or Dynamic report, and click Finish. The
report will generate and you're ready to start working. By default, reports
generate in read-only mode. There is an Edit Document button (top right
corner of the report), which will reopen the report such that you can edit. Your first
report
Congratulations,
you've just generated your first LibreOffice Base database report. Now that
you understand how this is accomplished, you can start crafting extensive
reports from all your databases. Enjoy that easy to read data. |
|
|
|
|
|
|
|